Solving pick a stick
Pick-a-stick as POMDP
Finding the sticks order
The main task I had to solve was to create a program that would tell the arm to move at a certain position, take photos (RGB and depth) of the observed scene (the cameras are mounted on the arms), and deduce, thanks to the depth image, which stick is on top of which one (by providing an adjacency matrix).
I’ll explain the algorithm using photos were no black napkin in on the table, for better understanding. We could have used filters for detecting edges for example, as advanced ones (e.g. Hough Transform), or even go for Convolutional Neural Networks (CNN techniques, such as YOLO detection) but we have chosen a more basic, but still working approach. We here wanted to follow a simple credo:
When confronted to a problem, one should first try to solve it using math, then go for algorithmic, and if those two techniques would not work, use learning techniques.
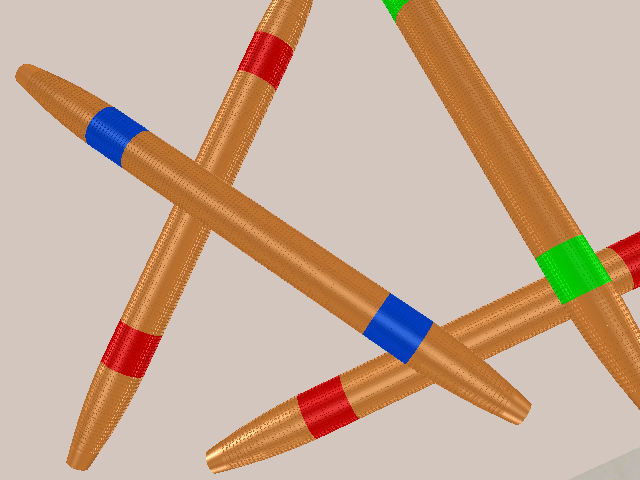
We thus decided to take advantage of the sticks’ property, the two colors on their sides. In order to detect them, we use color filter, available in the OpenCV library.
A simple example of how those filters work:

On the previous image, the red color is filter, and we obtain an image with white pixels (1) where red is present in the original image, and black ones (0) where any other color is.
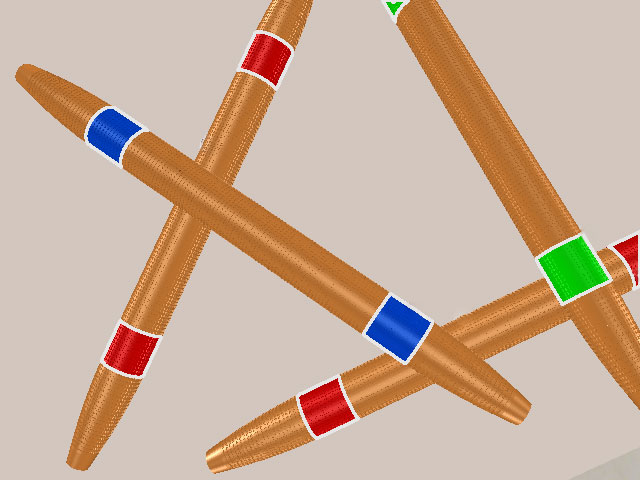
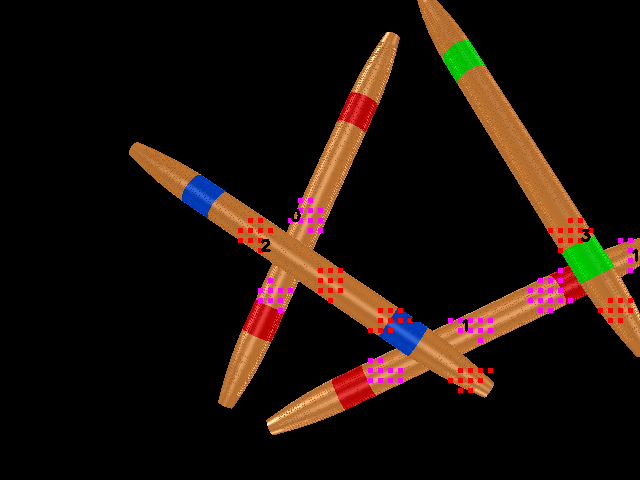
This allows us to detect where those extreme parts are:
We then look between the two boxes of the same color, and check whether the connecting region has a brown (mikado wood stick) color, or any other mikado extremity color (here blue, green and red). If so, it means that the two color boxes correspond to a single mikado, otherwise not.
We can thus connect our boxes and extend our mikado to have an approximate region:
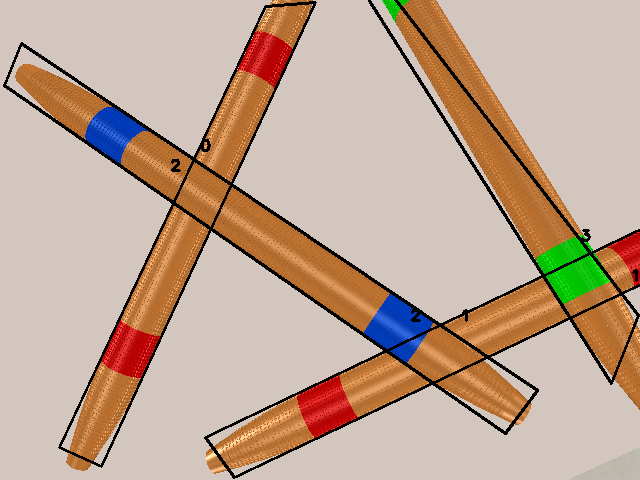
We can also assign a number to each mikado stick.
Now that we know where are the mikado sticks, we have to find which one is on top of which one. For this, we will use the depth image. We find intersections of two mikados, and look at the surrounding region of this intersection, that belongs to each stick.
Those regions are shown in the next image:
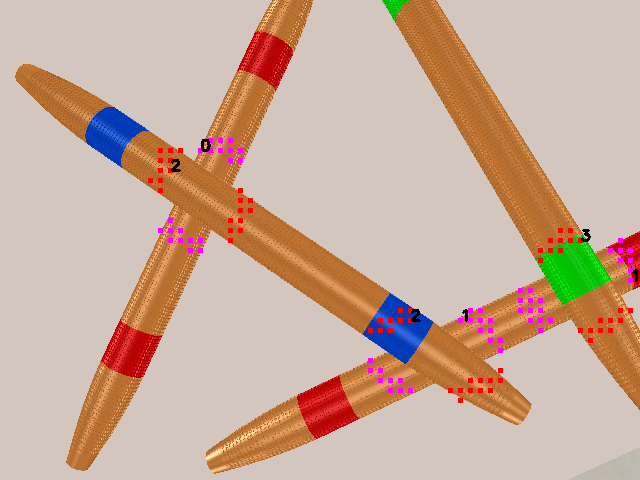
We evaluate the average depth of the points presented on the previous image, and thus, can fill an adjacency matrix. The final result looks like this:
This project was conducted by a group of researcher from the IAS lab of TUD. The goal is to solve the game Pick-a-stick, were two (or more) players have to pick sticks from a randomly shuffled stack of them.
There is only one rule: if a player, during its turn, moves more than one stick (i.e. he accidentally pushes another stick with its hand or the sticks he is targeting), he must stop his action and it’s his opponent’s turn.
Mikados (other name for the game) sticks have different colors, corresponding to different points. At the end of the game, the total number of points gathered by each player is calculated, the winner is the one with most points.
Whereas Markov Decision Processes (MDP) are usually used for representing a Reinforcement Learning problems, the researchers I was working with decided to model it as a POMDP (Partially Observable MDP). The robot has indeed not access at the complete information, and this last can also be very noisy.
My tasks
Designing the mikado stick
The first problem was to find mikado sticks that the robot would be able to grasp. Most of the available games are very small (intended for human beings) and the robot would struggle to catch any stick. We thus decided to produce the stick ourselves.
We could have bought wood and painted it, but we finally decided to 3D print the sticks, with a wood/plastic filament. This brought one conception advantage: we could change the numerical design a lot and adapt it. For example, I have incorporated tiny holes into the design to augment the surface (and thus the friction) between the soft material on the end effector (SAKE gripper) and the stick. This is bio inspired from the gecko (more information here).
Here you can see all 3D parts before assembly:
Creating a Virtual Environment Scene
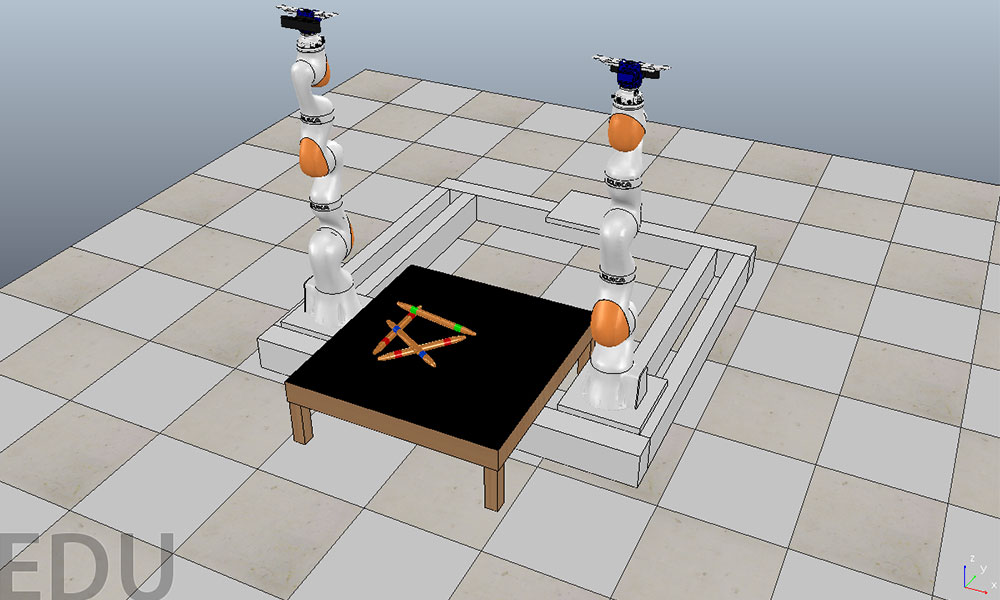
The first task was to create a virtual environment (a scene) in a simulator to train/experiment easily, and be able to prototype programs before implementing them on the real robots (Kuka iiwa arms).
Here are some photos of the scene and robot moving in it:
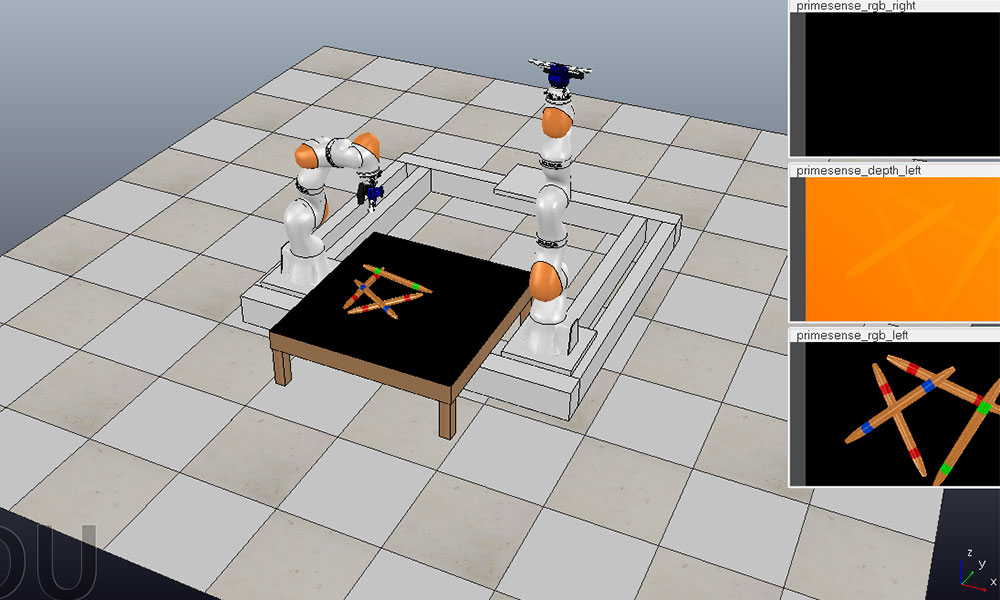
On the last image, you can see the visual flow provided by the depth-camera. In the lab, an Intel Real Sense Camera was used.
Adjacency matrix:
| 0 | 0 | 1 | 0 |
| 0 | 0 | 1 | 1 |
| -1 | -1 | 0 | 0 |
| 0 | -1 | 0 | 0 |
Here 1 means is above while -1 means is under.
Thus, the third raw means: 2 is above 0 and 1, and has no relationship with 3 (and himself)
I am not allowed to provide the source code but if you want any more information, please feel free to contact me.